

Dragonfly Mixed Media Tag

Sometimes I recommend and attach affiliate links to products in my tutorials. If you click on those links and buy something, I will make small commission at no extra cost to you.
Skill level: Beginner
Time needed: 30 minutes
Today I decided to play around with all kinds of mediums and came up with this cute little tag. It can be used for any number of things including art or a fun gift tag.
This is a simple, low-pressure way to learn some basic mixed media techniques, so have fun experimenting! There is plenty of room to get creative with this lovely mixed media tag and it can be used for any occasion.
When you’re ready to get started, check out the supply list and step-by-step instructions below.
Supplies:
Mixed media paper
Precision scissors
Brown watercolor
Ivory and gold acrylic paint
Paint brush
Paint pens
Flower embellishments
Dylusions spray inks- Blue and Pink
Wire
Hole punch
Stencil- I used a dragonfly but you can use anything you want.
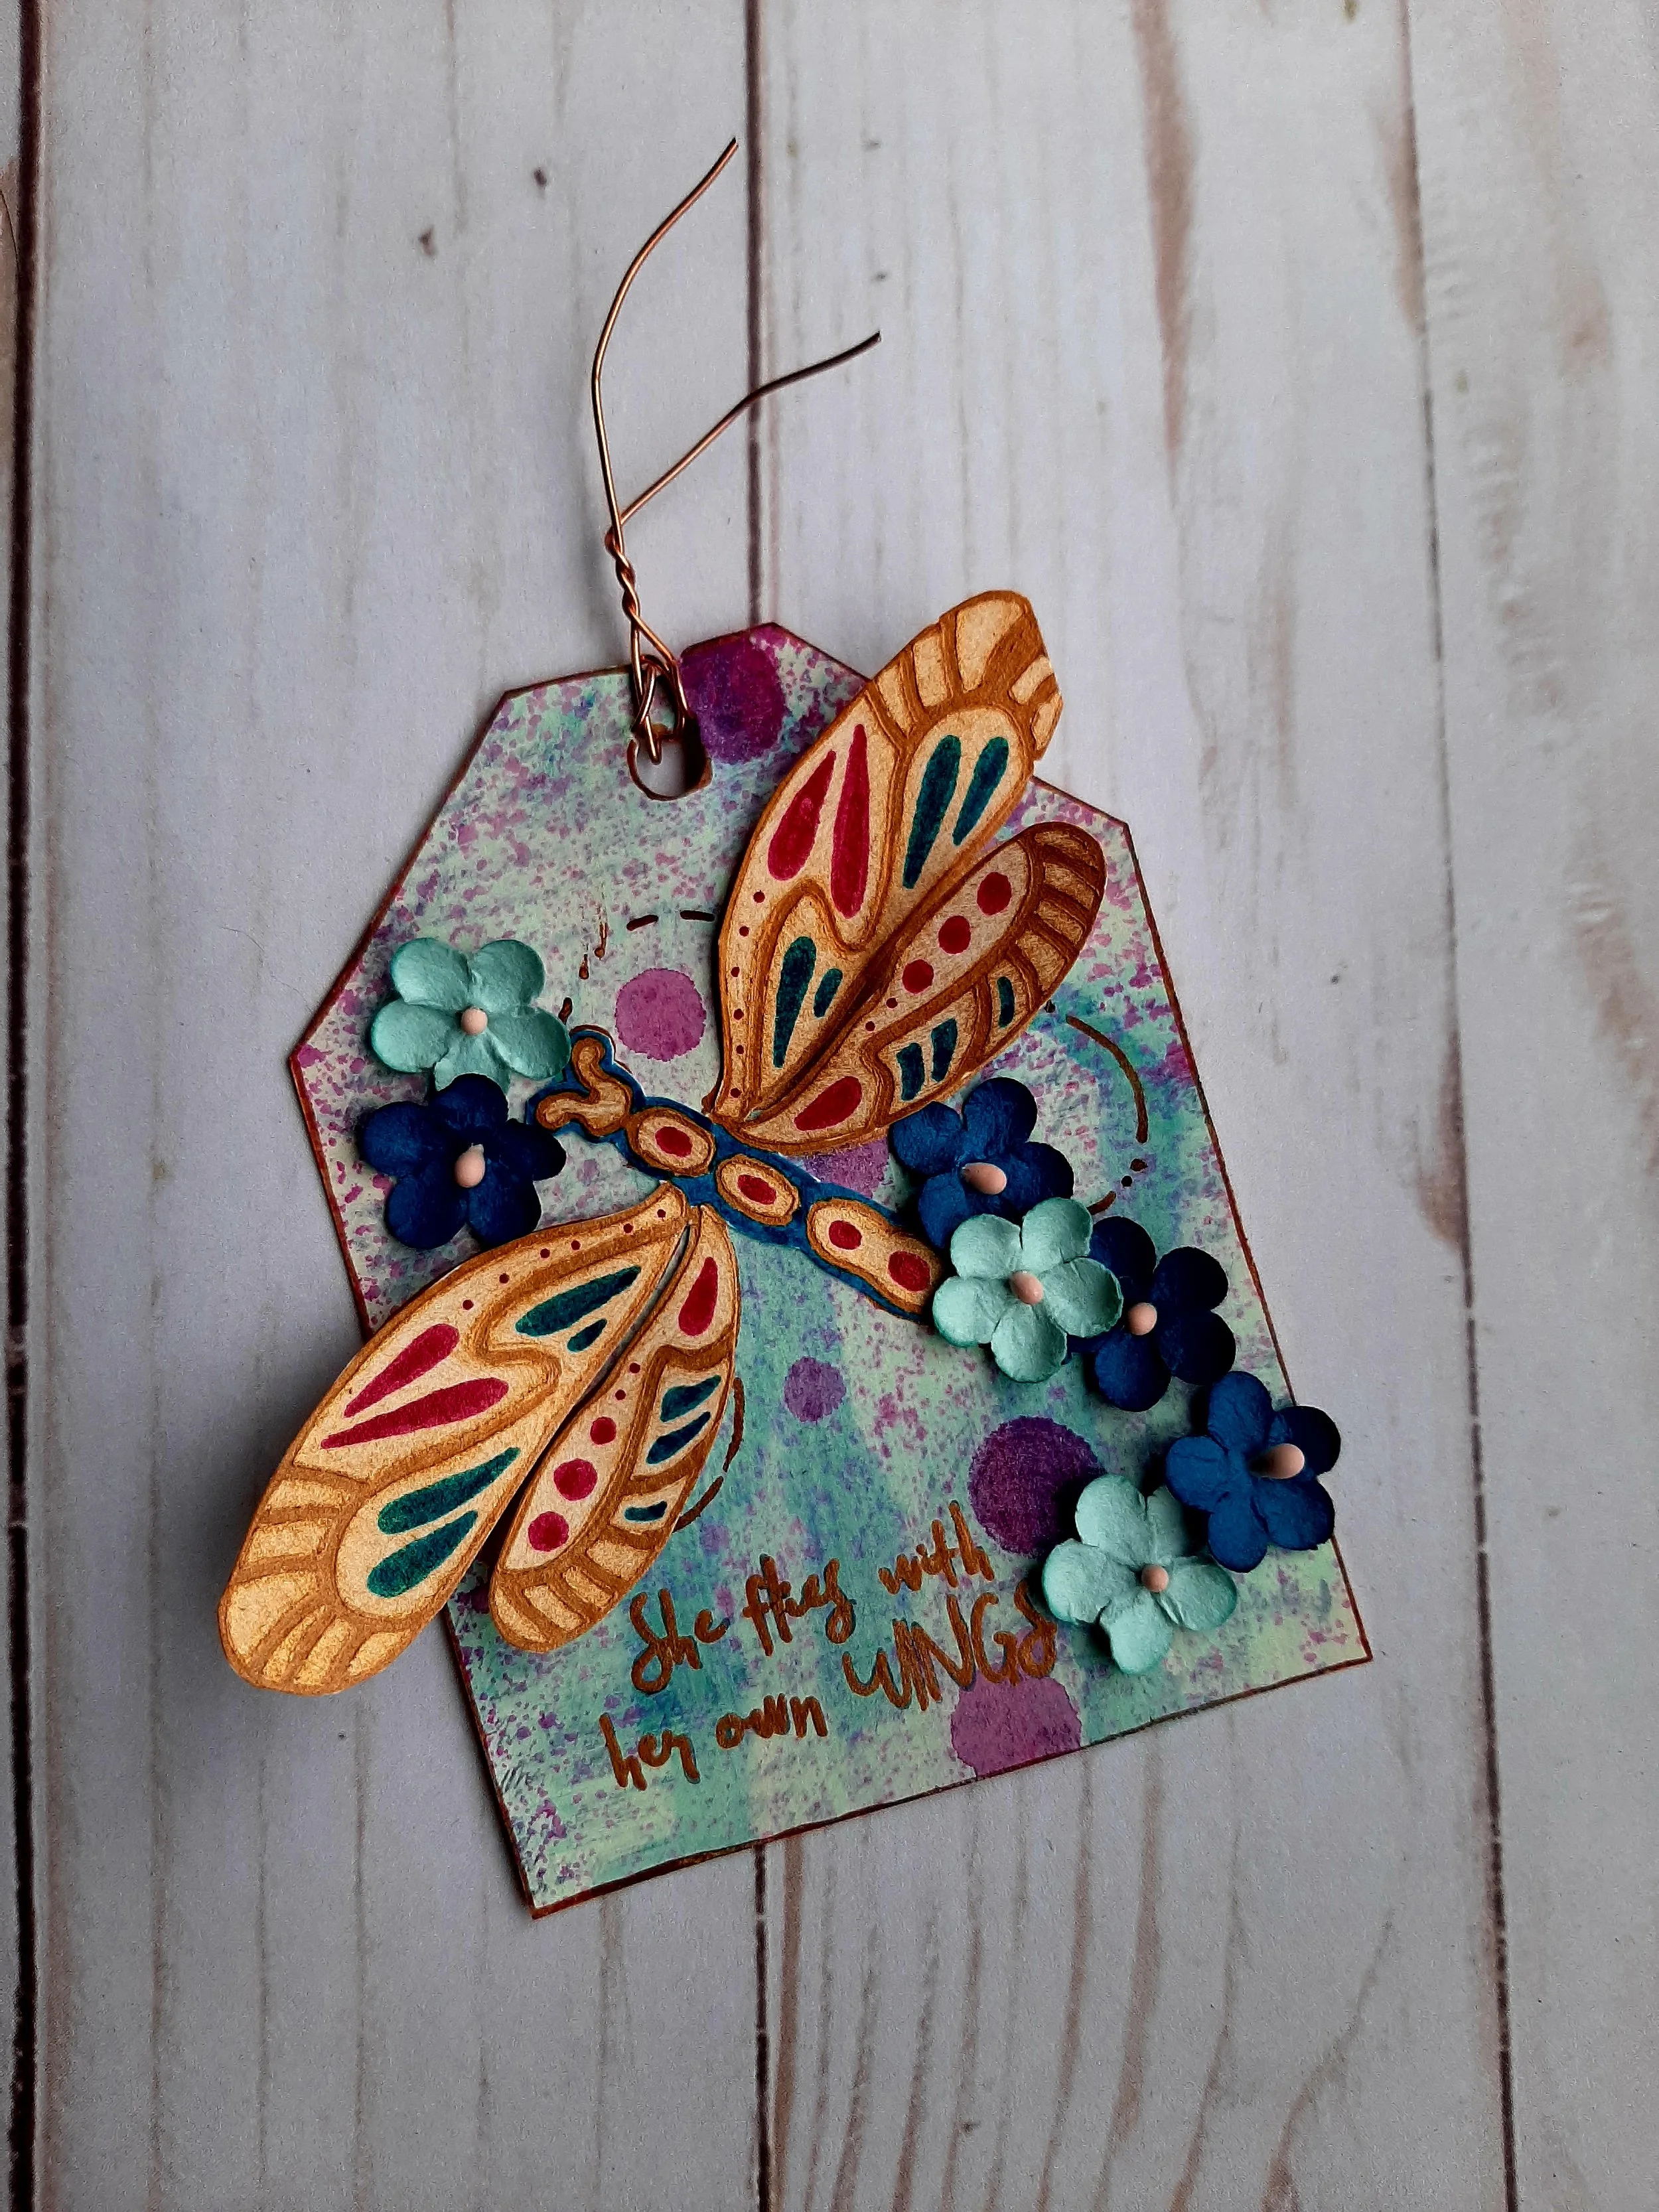
Cut out a tag shape, any size you want.
Paint the tag lightly with brown watercolor and let dry.
Lightly paint ivory acrylic over the watercolor and let dry.
Dip a small round object (like a bottle lid) into blue spray ink and place onto the tag, creating circles.
Hold the tag upright and let some of the spray ink trail down the paper.
Repeat steps 3-4 three times and let dry.
Spray the tag with pink spray ink and let dry.
Punch a hole in the top of the tag.
Trace the edge of the tag and the hole with a paint pen and let dry.
Add small details over the ink circles with a paint pen and let dry.
Place the stencil on a separate piece of mixed media paper and paint with the gold acrylic. Let dry completely.
Add details to the stenciled image with the paint pens and let dry.
Adhere the stenciled image to the tag. I only glued down the body so the wings “float”.
Write your phrase with a paint pen and let dry.
Adhere flowers to your tag.
Cut a small length of wire and wrap through the tag hole a couple times.
Twist wire ends together for completed look.
Happy crafting,
Misty
I’d love to see your designs! Post a photo to the Facebook community, Instagram with the hashtag #MadeWithCreativelyMisty, or below in the comments.
Love this free tutorial? There’s plenty more to choose from. Find more free tutorials here. Ready to up your crafting game? Look into booking one of my creative workshops.
