

DIY Faux Tile Tutorial
Sometimes I recommend and attach affiliate links to products in my tutorials. If you click on those links and buy something, I will make small commission at no extra cost to you.
Skill Level: Beginner
Time needed: 30 minutes
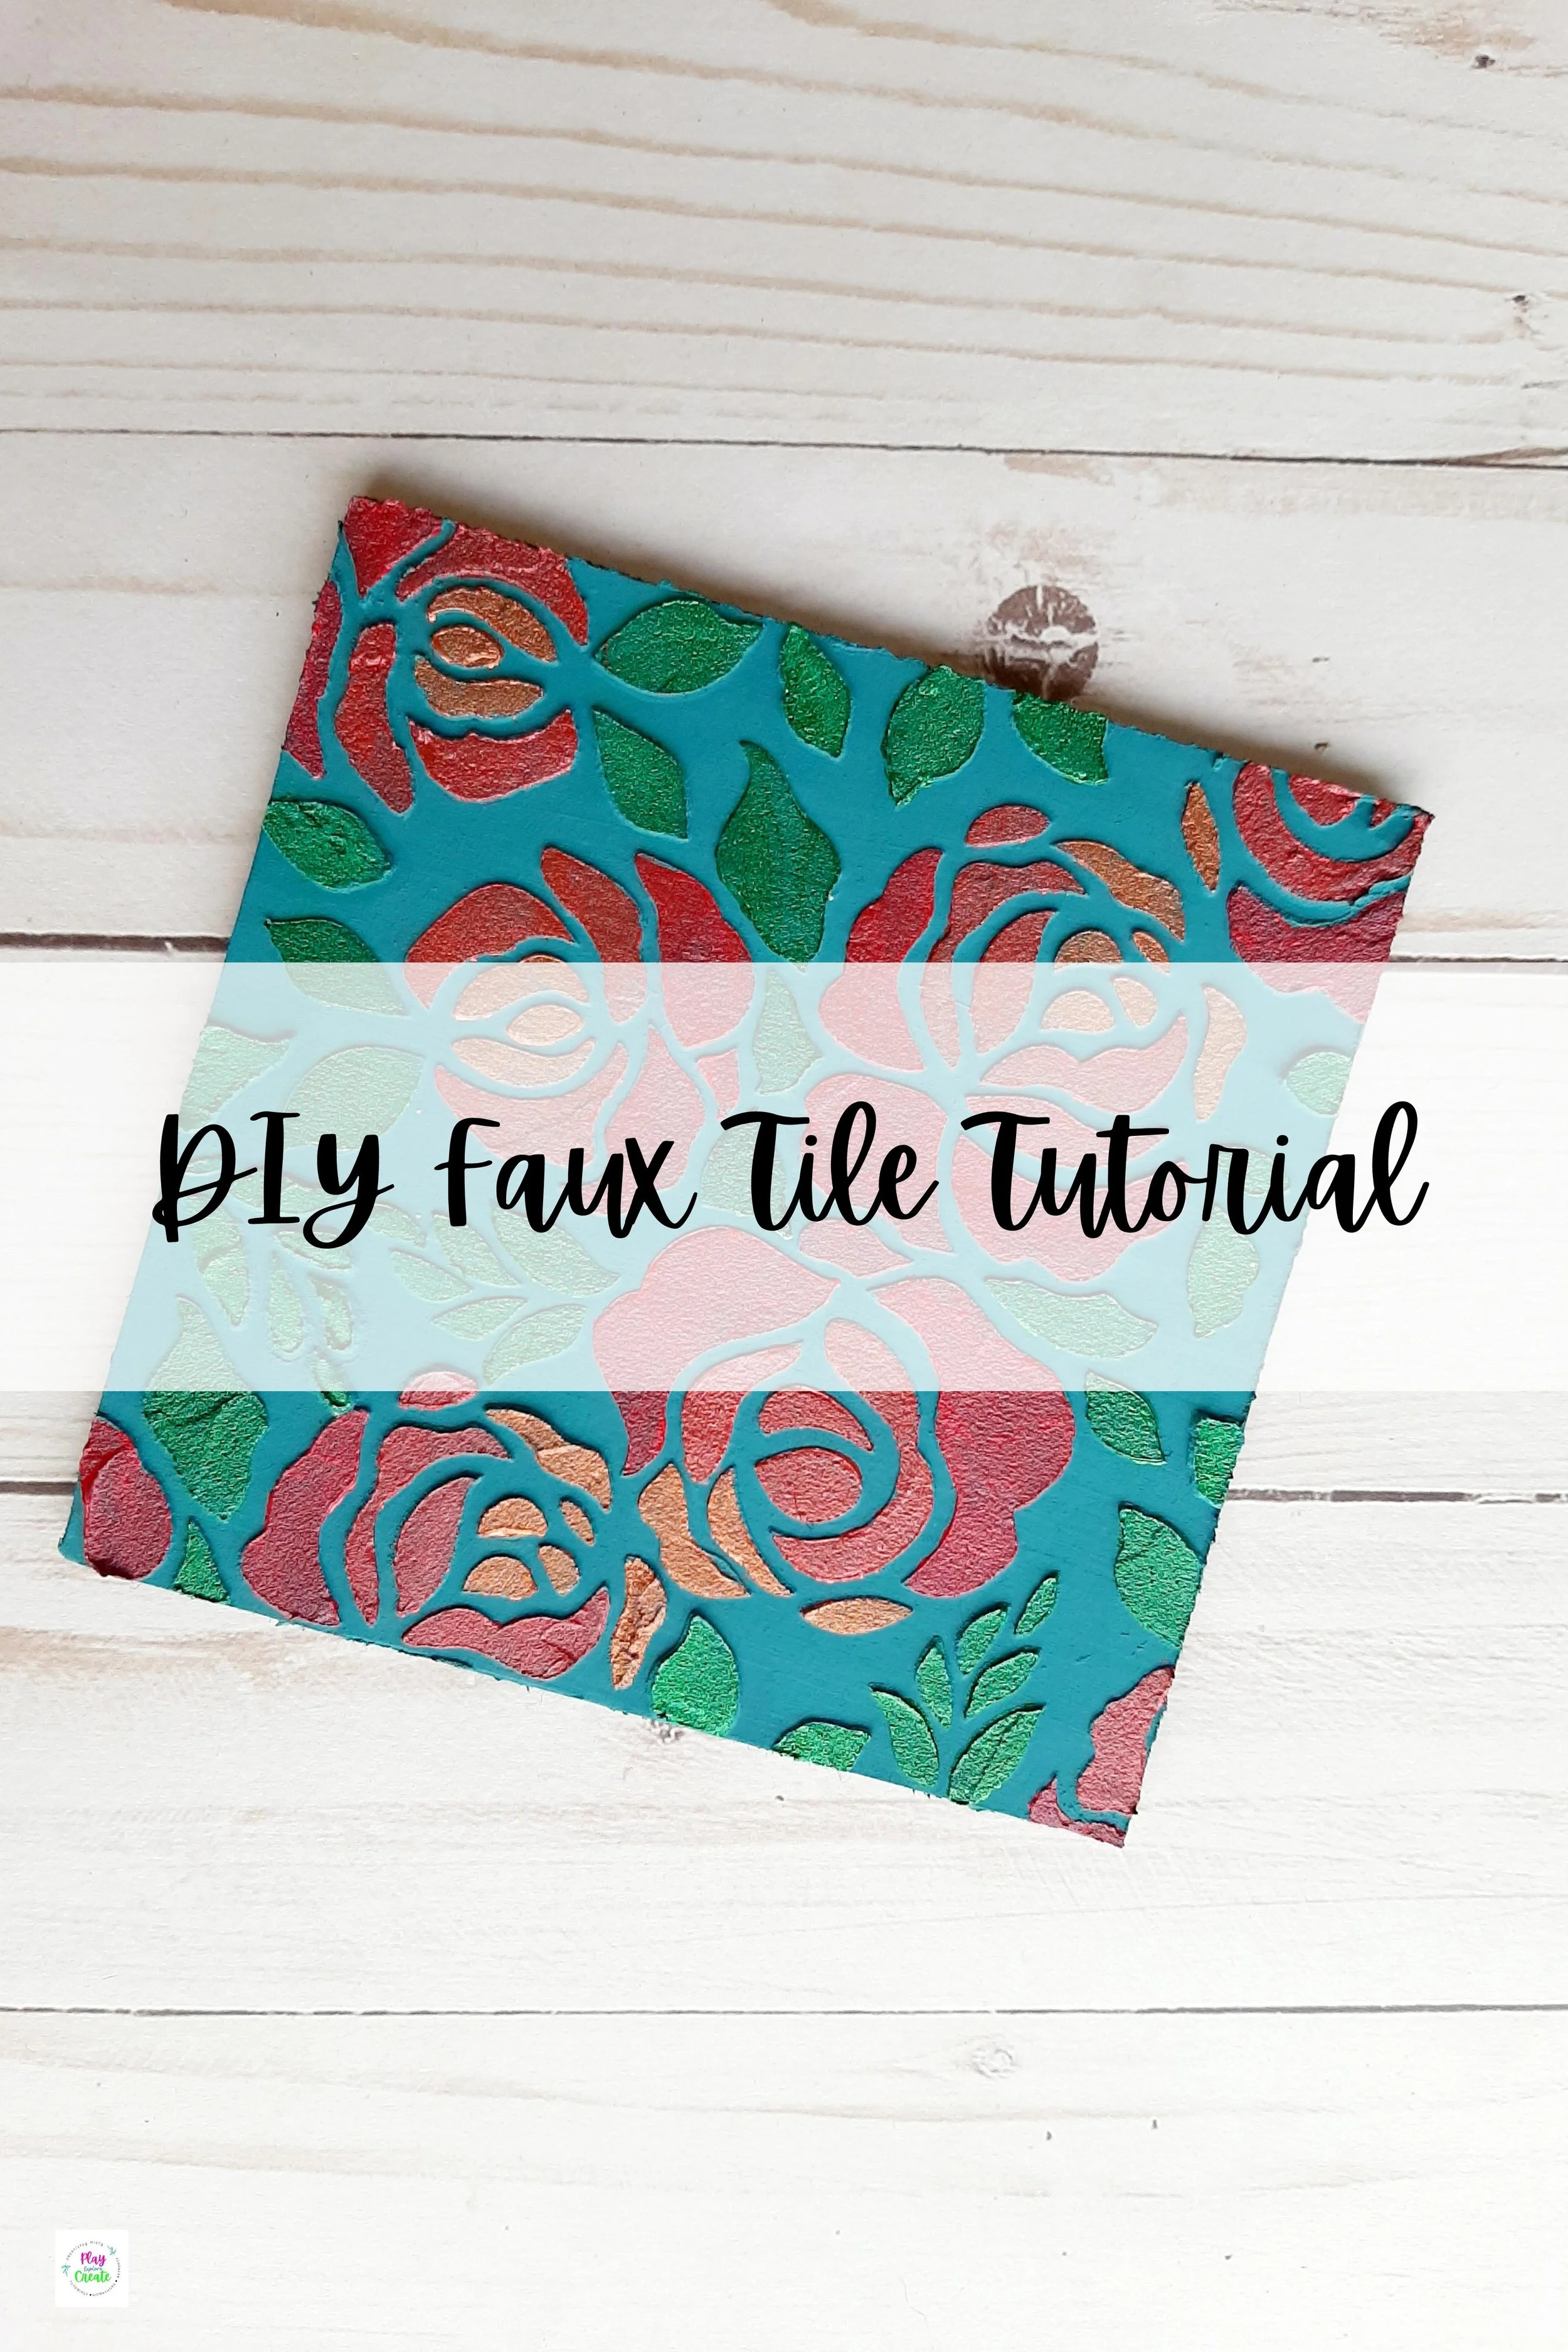
I simply love mixed media! There are so many amazing things you can create and countless ways you can use those creations. Take this lovely mixed media piece. I can hang it on the wall as a beautiful piece of art or I can take it a step further with some resin and create something entirely different, like say a faux tile for a wall backsplash.
Supplies:
Cardboard
Utility knife
Stencils
Acrylic paint
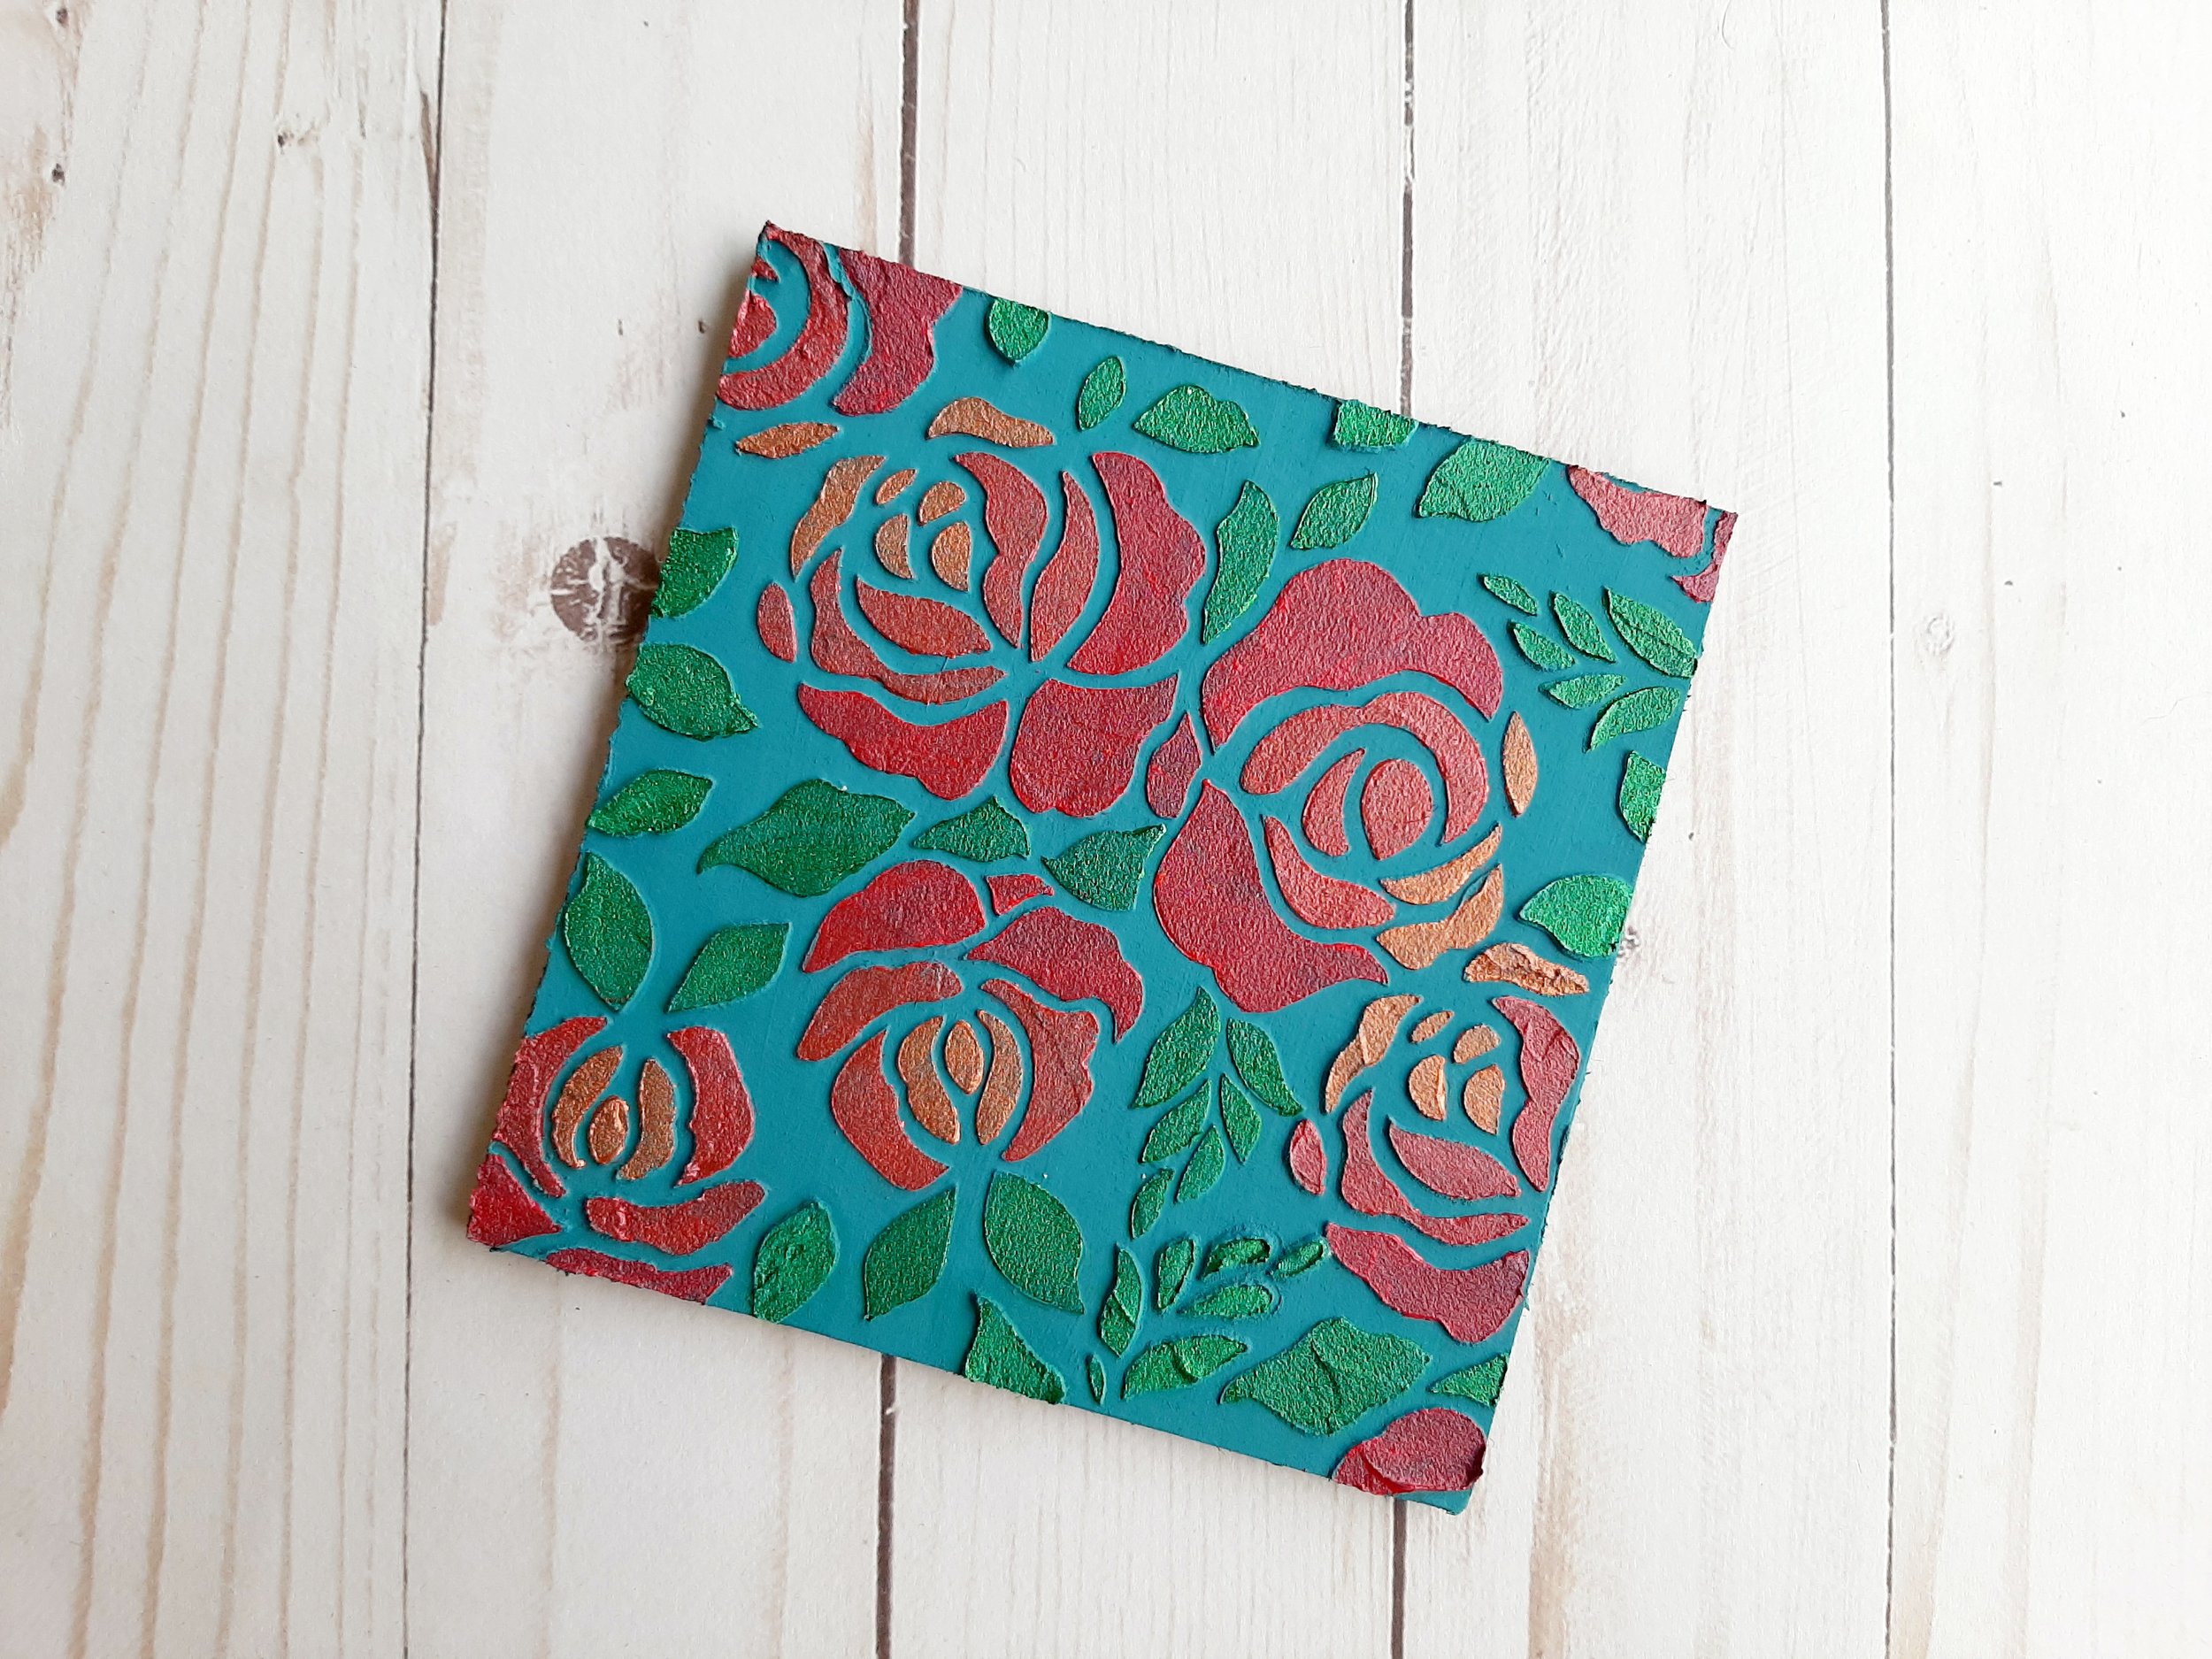
Cut a 5x5” cardboard square.
Paint the square and let dry.
Mix the acrylics with modeling paste.
Secure your stencil onto the cardboard.
Use a pallet knife or other smooth object to add modeling paste colors to the stencil as desired.
If you choose to move the stencil at any time, make sure that the modeling paste has dried completely before putting the stencil back onto the cardboard. Also, clean the stencil to remove any modeling paste before reusing.
Once your tile is complete and dry, follow the instructions on the resin and add a layer over the tile. Let dry completely.
Happy Crafting,
Misty
I’d love to see how yours turned out and what you decided to use them as! Post a photo to the Facebook community, Instagram with the hashtag #MadeWithCreativelyMisty, or below in the comments.
Love this free tutorial? There’s plenty more to choose from. Find more free tutorials here. Ready to up your crafting game? Look into booking one of my creative workshops.
